Showing posts with label craft. Show all posts

March 17, 2015

Cottontail Bunny Bunting


This easy project took just 5 minutes and $5, but satisfied my creativity for the day!  I was inspired by this post and with a Target trip on my list this morning, I made sure to bring home the bunting and some cotton balls.  I just plugged in my hot glue gun, gave each cotton ball a good roll in my hands to make perfectly round, and then glued them on.  What an easy little project with a fun festive outcome for spring!  

You can find The Spitz Easter Burlap Bunny Garland here (it was out of stock when I looked last night but today is back in stock, so hurry to snatch yours up!)

May 22, 2013

{un}crafty - coffee filter flowers.

we got to host our moms here for mother's day! {read more about it on our family blog here}  
it was a great day to spoil them with a lovely lunch after a pretty amazing church service.  i feel like now that my "baby" is 14 months old, i am finally getting my wits about me again - it was fun to plan and craft!  i tried to make the day special for our moms, so i started planning {and crafting} early.  i wanted to help the kids make something for their nana & baggie, so we went with the flower theme and made some super easy coffee filter flowers and painted glass vases for them to take home with them on mother's day.

{our flower themed mother's day lunch}


supplies you need:

coffee filters

markers

spray bottle with water

straws {or pipe cleaners}
empty and cleaned glass jar

craft paint

 i'm certain we have all seen the method of pour paint into a clean glass jar and swirling it around inside until it is covered...that's what i did here.  i just used some paint left over from other projects.

 then i used some metallic pearl white and gold paint on the end of a pencil eraser to make some random dots around the outside of the jar.  it was easy.  i did the jars while the kids were coloring their coffee filters.  {but kids could totally do the paint in a jar thing - easy and fun!}

just scribble around on the coffee filter until its pretty much covered.  it doesn't have to be all colored in {although my very thorough 5 year old made sure to cover every inch} because when you spray with water, the colors with bleed.

once the coffee filters are colored in, spray with water and let them sit to dry {i set our on paper towels in the kitchen while the dried}.  then to add stems, fold your filter in quarters and either glue the tip into a straw {striped paper straws would be so cute!} or wrap with a pipe cleaner.

 this is such a quick and easy project! {and no mess!}  the flowers are so fun because each is so unique.  i think this would make a cute teacher gift too {maybe add a little gift card to their favorite lunch or coffee spot}.


happy {un}crafting!


April 18, 2013

{un}crafty - no sew fabric strip garland.

here we go: another super easy, no skill required, fun little craft for you!

i made this fabric garland to hang in our toy room 
{this is a live action shot from a sick day at our house - "Dolphin Tale" anyone?}

its fun, festive, and so easy to make.


supplies you need:

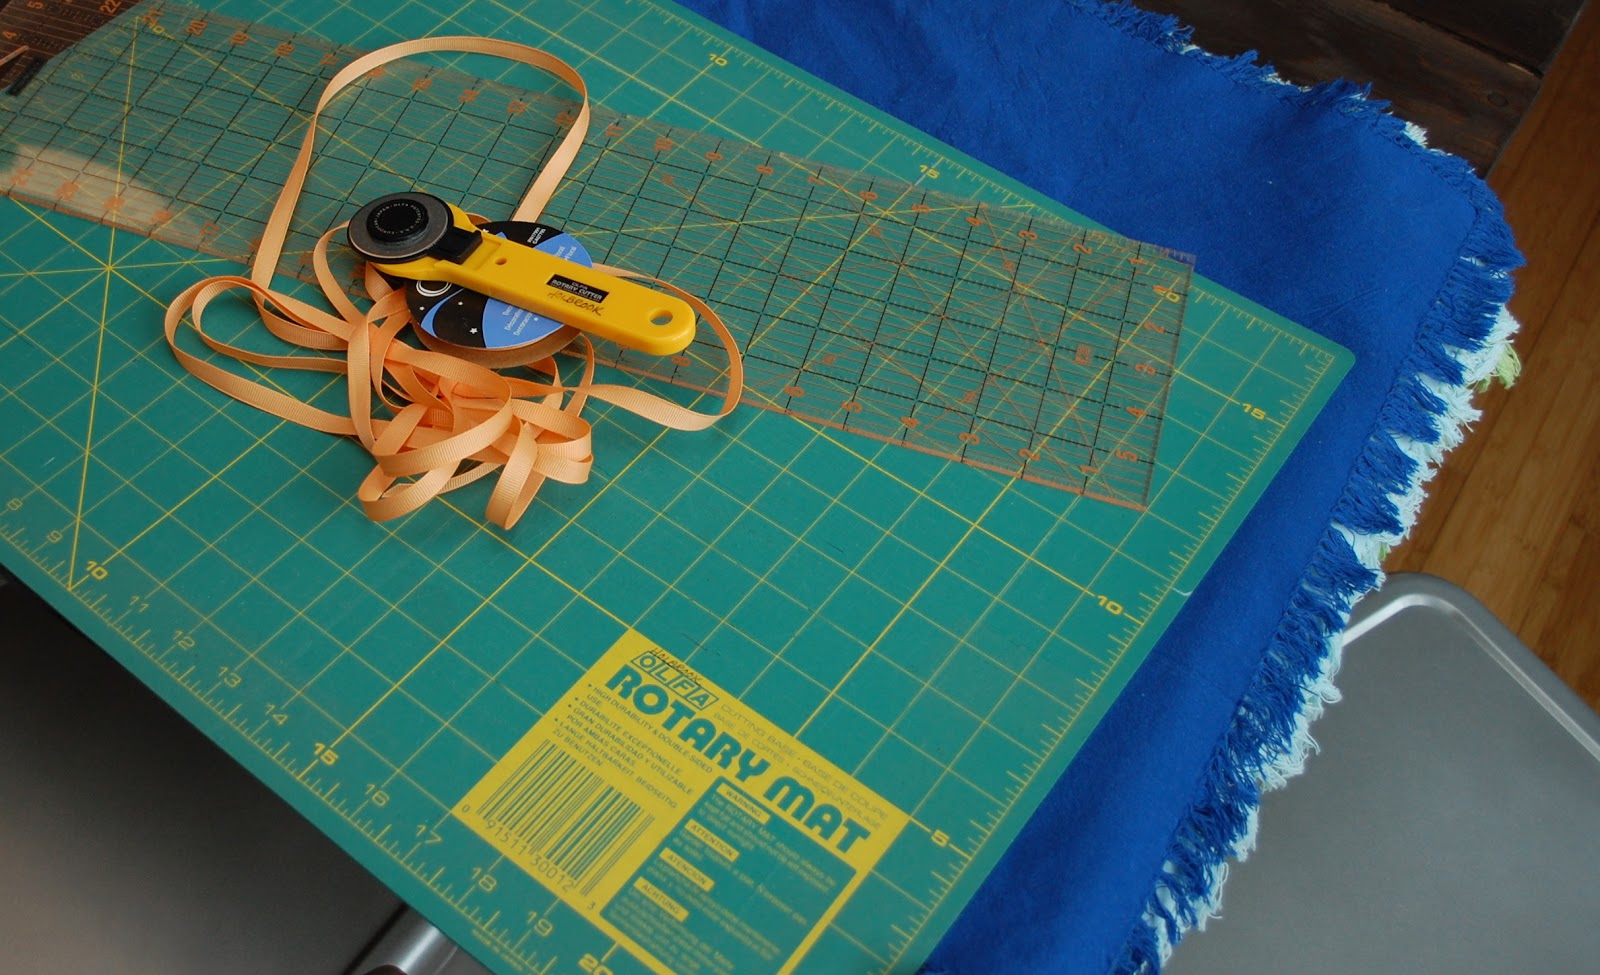
rotary cutter & cutting mat {or just a plain old scissors!}

ruler

fabric scraps {anything will do}

ribbon

i had some cloth napkins in bright colors that were screaming for a re-purpose, so i finally decided to do this craft.  i followed some advice from Joy's Hope blog to get me started.

i started by ironing out the napkins.  then i used a rotary cutter and mat to measure and cut.  i measured 1x18 inch strips and cut accordingly.  it was a lot of cutting!  i think the strips could be longer if your fabric allows - my tassels ended up being pretty short once they were tied on.

i lined up all the fabric strips and got out my ribbon.  
i followed a pattern, but random would be really cute, too!

to tie the strips onto/around your ribbon, i followed the steps shown above.  
kind-of a loop, more than a traditional tie.

i just kept going until i had a length long enough for the wall i intended the garland to hang on.  i used command strips to hold the banner up and we like it!

i'm thinking of making another for my living room using an old tablecloth, some burlap, and ribbon...

happy {un}crafting!


April 16, 2013

{un}crafty - faux metal letters.

of course we have all seen anthropolgie's metal letters that are awesome.  but i was looking for a cheaper way to make metal letters in my boys' room.  i had previously covered letters in scrapbook paper for my oldest son's room in our other house.  but i wanted something more modern and more boyish for this room.  so, i set out to fine a way...


forgive me, but i found this idea somewhere online.  i have no idea where.  if you google "faux metal painted letters" you will find a million tutorials.

just a reminder: the crafts you find here don't require any artistic skill or crazy tools to complete.  just a little patience and some post-bedtime minutes {and a glass of wine...ok that's up to you}.


supplies you need:

paper mache/cardboard letters {joann's has sales or use a coupon}

black craft paint

silver craft paint

foam brush


 paint your letters black and let them dry.

then brush silver over the black running your foam brush in all directions.  you can't even mess it up, just brush like crazy with the silver paint until you have covered all the black.

this whole project took only a part of one evening for me.  i had 12 letters to paint and it was super quick.  one coat of black, then by the time i was done with all 12 letters, the first were ready for a crazy coat of silver.  i hung them up using 3M command velcro strips - easy!

your letters will look like galvanized steel.  voila.

happy {un}crafting!


April 12, 2013

{un}crafty - easy kids art.

its not always easy to get the kids painting.  trust me {i know}.  as a stay at home mom, making the mess of painting with little kids can sometimes be the last thing you want to do.  but its ok to let go of that fear and help your kids create something they are proud of and had fun making.  it doesn't have to be a {huge} mess!


supplies you need:

garbage bags

acrylic paints {kids crayola paints work great}

paint brushes {or foam brushes, or old sponges}

paper plates

canvases {cardboard, paper - anything to else to frame}

i cut open a garbage bag so it lays flat to cover our table and pour paints onto a paper plate for each child.

then i let the kids use paint brushes and old sponges to make a masterpiece.  we used small canvases i had on hand, but any piece of cardstock or paper would work in a frame.

kids love to be creative and with the paper plates and garbage bag, my only clean up is washing out and paintbrushes or sponges i want to keep.  easy.

 this particular project was painting canvases to hang in baby sister's room.  she was about to arrive and the boys wanted to make something special for her brand new nursery.  its probably the most special part of her room!

let your kids create something for a new sibling, grandparents, or neighbors who are sure to love the special gift!

happy {un}crafting!

December 2, 2011

(Un)Crafty - T-Shirt Scarf

I am not a Black Friday shopper, so on the day after Thanksgiving, my sister and I decided to do a few projects.  She was more ambitious than me and made some cute glittered votives, but I just came away with this super easy to make t-shirt scarf.  

We bought XL size cotton t-shirts and used my mom's rotary cutter and mat. 

 Step 1: Cut off the bottom hem.

 Step 2: cut off the top of the shirt from right under the sleeves.  Then you are left with a tube.

 Step 3: Measure and cut into strips.  I did about 1-inch strips.

 Leave about one inch (or more) of the tube uncut at the top - this will be how your loops stay connected.
 Step 4: Stretch our each loop - this will cause the cotton to curl.


Voila!  Ours are bug enough to double up around your neck and are pretty cute!  I'm thinking of making more...it took up only about 10 minutes!

December 1, 2011

(Un)Crafty - Christmas Countdown

Happy December!  Can you believe it?  The fall was beautiful and it went by so fast!  We are busy: still moving into our new house and preparing for our new baby who will join our family in just three short months!

Since today is the first day of December, it was the first day to put our Christmas Countdown, or Advent Calendar, to use!  The boys were so excited when they woke up!  Of course, they would love to go through each day this morning and enjoy all the fun and treats.  Waiting each day will be the hard part!

With our life circumstances feeling super crazy, this is an especially (un)crafty project!  I pulled out all the Christmas and winter-themed books (about 40 in total - whoa!) and wrote the titles on popsicle sticks.  The sticks fit well in the felt calendar I made a couple years ago.

 This project took over the dining room table for a couple days.  

 I wrote the titles on each stick, leaving room at the end for a treat!

 Then I wrapped up all the books in some wrapping paper from the Target $1 Spot.  I used 4 rolls to wrap all the books.  Each book is numbered so when the boys take the sticks out of the "December 3" pocket, they can find the books with a "3" in the basket under the tree.


Most days have two books, which is perfect for two kids.  They each get to pull out a stick, have a treat, and open a wrapped book.  Do you have any great advent calendar ideas?  You can find some seriously crafty calendars at Hi Sugarplum's link party.

November 20, 2011

Funky Feathered Turkeys

We made some fun feathered turkeys thanks to my cousin who sent the supplies in a care package.  My four year old really loved this project.  Our turkey family totals about TEN because we had such a great time creating!


Supplies:
construction paper, scissors, pencil, glue stick, feathers, puffs, pipe cleaners

Directions:
Trace hands and cut them out of construction paper.  Then glue feathers and other embellishments onto hands as you please!  Cut pipe cleaners for legs and tape to back of turkey.

from cousin Angie's blog
From Angie's blog

November 8, 2011

Turkey Family

Now that Halloween is over, the Thanksgiving decorations can come out.  We don't have much going on for holiday decor this fall, but I am determined to get the new house set for Christmas.  I thought this turkey family was so adorable on eighteen25.  Thanksgiving is such a great holiday to get our kids to understand, so this interactive activity is on my list!

April 30, 2011

(Un)Crafty - Stenciled Tray

Ages ago, when shopping at Target, I found some little wooden trays in their bargain bins.  They were $2.50, so I bought two to experiment with.  I just finally finished the first - its a gift, but it turned out great...good enough that I kinda wanted to keep it.  :)

This is such a special gift and even though it isn't much, there is special meaning behind it.  Our friends did something so special for our family.  We were so blessed by their generosity.  I knew I wanted to do something special to be sure their actions did not go without notice.


I started by sanding the wooden trays, wiping them down, and then using a spray primer to cover.  Part of the delay on this project is that you can't spray paint while the weather is freezing.  We had a looooooong winter here!

Then I coated the tray with some regular paint I had left from this project.  Because I used a dark primer and the paint was light, it took many many many coats to cover evenly.  Oh well.  I used a foam brush and it was such a small surface to paint, it was quick!

I was inspired by Jen at Tatertots and Jello when I saw her quatrefoil projects.  I downloaded and printed this stencil on cardstock.  Cutting out the pattern was the most difficult part of this project!  Then I just traced the stencil, making sure center the pattern on the surface.

I used some Metallic Folk Art paint from JoAnn's that I found on clearance to make this tone-on-tone color combination.  Then I coated the tray with some protective spray to keep from damage from water, scratches, or heat.  I love how the tray turned out - totally luxe for just a few bucks and a bit of (un)craftiness.

The tray can be used for anything!  Everything looks better with a tray: end tables coffee tables, kitchen counter, bathroom, bedside table...I can think of a million places to put these!  Luckily, as I walked past the bargain bins this week, I saw one more lonely tray sitting there, so I snatched it up!  This time, it was on "clearance", so it was only $1.75.  I'll have no problem working out a place to put it (or someone to gift it to!).

This tray was filled with some casual goodies for our sweet friends.  
"Much love, deep gratitude, many blessings"