Tools you will need:
- glass filler rocks (available at Michaels and other craft stores)
- a clear gel adhesive (like Martha Stewart clear gel adhesive - available at Michaels)
- hot glue gun
- magnets
- scrapbook paper
- scissors
Glass rocks have one domed side and one flat side. Lay them out flat and get ready to trace.
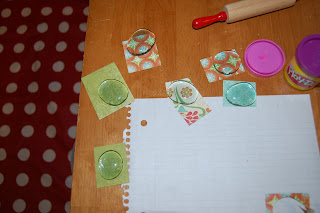
Since each rock is unique in size, I traced one at a time, then cut around the traced circle and left the corresponding rock on top. That way, I didn't lose which rock fit on which paper. Once I had several, I cut them and glued them all together. As you can see, my son had a little play-doh fun going on at the same time.
Once the paper is cut, apply a small amount of the gel adhesive and press together.
Once the adhesive seems dry, you can apply the magnets.
Use your hot glue gun to attach a magnet to the back (the flat side) of each rock.
I really love these magnets! It was such a fun, easy project! They look so lovely and decorative on my magnetic board.
These magnets are so inexpensive, you could easily make seasonal sets to give as gifts! I think these might be great teacher gifts...


3 comments:
I love these things! I made some a while back, but this makes me want to make some more. Thanks for sharing. Visiting from TT&J.
Amy @ The Happy Scraps
I love these magnets! I've made some before but I went the slightly more lazy route... got the smaller, round rocks and bought a scrapbook hole punch that was the right size. :)
Really? They're that easy to make? Well, I just may have to try them. This is going on my to-do list for sure!
Post a Comment