March 20, 2011

Mark Your Calendars!

The Hoyem Acres Garage Sale

April 29-30
(Friday and Saturday)

Rain or shine...8am - ?

A whole neighborhood of garage sales 
(or "thrift sales", if you are an original Wisconsonite!).

March 17, 2011

(Un)Crafty - Silhouettes

Last fall I started to notice the trend to have silhouettes of everything...especially your kids.  But, any silhouette: from a vintage chair, to the eiffel tower is an easy statement to make in any room.  Take a look around blogland and you will find zillions of them!  Or, take a look around Etsy and you will find a million versions of signs, frames, and artwork featuring silhouettes.

Naturally, I decided to venture out and see what it takes to make a silhouette.  I have no fancy computer skills, no fancy cutting machines, no photography background.  So, if I am going to make something (I'm UNcrafty, remember??), its gotta be easy to do, cheap, and fast.

I was surprised to find that silhouettes are so easy!  I found Emily's tutorial here and decided to give it a go.  *Admittedly, this project was done a loooooong time ago.  In fact, it was done the same stormy weekend as this and this.  I had the photos but never remembered to post about this project until our friends were over for a playdate yesterday and said, "Where did you have the silhouettes done?"  Ha!  Here it is, Shelly...the easy crafty project.  :)

The first step is to get a profile photo of your kiddos (or whatever your subject may be).  This is the trickiest part because those kids don't want to sit still!  I had them sit in a chair and snapped a few quick photos, then uploaded them and enlarged them.  I have my photos printed at Target, but you could just print them out on computer paper.  Quality will not matter for this project.

Supplies:
1. profile photos
2. black craft paint ($0.49 at Michaels!)
3. foam brush
4. newspaper
5. white tagboard
6. frame
7. scissors

Cut out your child's profile, but don't worry about being too perfect.  The larger the profile, the easier, but small silhouettes sure are cute!  Mine were big to fit an 11x14 frame.  I cut them out carefully and then just started painting.  It took several coats of the paint to make the photos really evenly covered.

Once I had the photos covered well, I let them dry and then cut a piece of white tagboard (matte side facing up) and just glued the silhouette to the tagboard.  Then, frame the tagboard and VOILA!  Your very own silhouette!  Can you even believe its that easy?!

Ours found a home on this wall in our family room.

I've since added more frames to make this a gallery wall of family photos.  The silhouettes add a nice touch!

Happy crafting!


March 15, 2011

our {lucky} friends

Some of our lucky friends - very special people in our lives - are going to get these cute little goodies tomorrow (okay...that is one day early for St. Patrick's Day, but oh well)!  I spent much of nap time perfecting them today and it was a fun little project.  I first saw it here and the downloaded the tag here.

Supplies:
1.  Rainbow Twizzlers (found at Wal-Mart - after looking several places)
2. chocolate gold coins (found at 50/50 Party Supply - after looking many places)
3. tag
4. ribbon
5. scissors
6. treat sacks (Target, Michaels, etc.)

I gathered six Twizzlers together for each bag (one of each color) and cute about one inch off the bottoms of the Twizzlers.  Then I put them in the bag, added gold coins and tied with a ribbon.  So easy and what a cute little gift to make your friends feel special this week!  One bag of Twizzlers will make 5 treats and I added 4-5 coins to each, so plan accordingly if you are buying supplies.

My kids informed me that they "don't like those" so I will have to think of something else to make them feel special this week!

March 14, 2011

Frenchy Brunch

This weekend I hosted my bible study girls for brunch.  I knew I wanted to serve french pastries and fresh fruit and keep the menu light.  As I was prepping on Saturday morning, I got the motivation to create a little french tablescape.  So... I pulled out my french tablecloth and scoured the house for some frenchy things.

These chalkboard coasters are one of my favorite things to use when hosting!  They were tile coasters that I just covered in chalkboard paint.  Now I use them for placecards, labels, etc.

The yellow tulips and lemons in my apothecary jar were the inspiration for the springy colors.

 Besides croissants, and pain au chocolats, nutella is the perfect addition to a french brunch!

(*I hope both Amy and Meredith are reading this...they share my french aficionado!)

March 11, 2011

(Un)Crafty - Art Display Line

I always love this product for hanging art work and my display line was a little boring at home.  So, I decided it was time to spiff-it-up.

boring.

Supplies:
1. clothes pins
2. small wooden discs (JoAnn's)
3. hot glue/hot glue gun
4. embellishments (mine are the little airplanes from JoAnn's)
5. Mod Podge
6. thin gauge wire
7. scrapbook paper
8. command hooks (mine are the small clear ones)
9. yarn/string/twine

I traced, cut and Mod Podged the paper onto the discs...

then hot glued the discs to the clothes pins.

I created a little wire ring and hot glue it to the back of the airplanes.

I placed the clear command hook where I wanted them and then slide the wire ring on the back of the airplanes over the hook.  It covers up the hook and give a cute detail to the display line.  Then hang your children's artwork and enjoy!


March 10, 2011

Favorites - Instant Coffee

To most real coffee drinkers, the word "instant" is not very promising.  It would not have been for me - except that Starbucks has their own instant coffee, VIA.  We are coffee freaks at this house and VIA instant coffee (or "ready brew") has changed my life!


Traveling, on the go, out of coffee, or running late - VIA is the answer.  It tastes like a good cup of coffee with just 8 ounces of hot water and one little packet.  I have them in my diaper bag and I take them on all our trips.

VIA is available in decaf, blends, and flavors...check it out!

March 9, 2011

Command Central Binder


Today is another snowy day...this winter has brought many days with unceasing snow!  Its a great excuse to stay inside and have some fun, rest up, and get some things accomplished.  Let me tell you...this messy house could use a "snow day" to stay in...


Messy house.  Ugh.  And I can't even show you our bedroom, the laundry, or the playspace.  Yikes!  But, let's be honest: what is really the point in cleaning up when you're just going to be inside with the kids all day?  Its just going to end up in the same condition.  Right??  Instead, I worked on a creating a Command Central Binder from Simplify101.com.  I found a link to a free mini-guide download on Just a Girl last week (I just checked and its still there!) and have been using the little bits of free time I have to begin collecting info for my very own binder.


I just followed the steps in the mini-guide and simply created a place for all our relevant, current information.  Since our children are so young (3 and 1), we don't have too many schedules, sports teams, or school notes to take care of.  Most of my supplies are just items I had around the house (except for the binder pockets for school newsletters and upcoming even invitations - both found at OfficeMax).

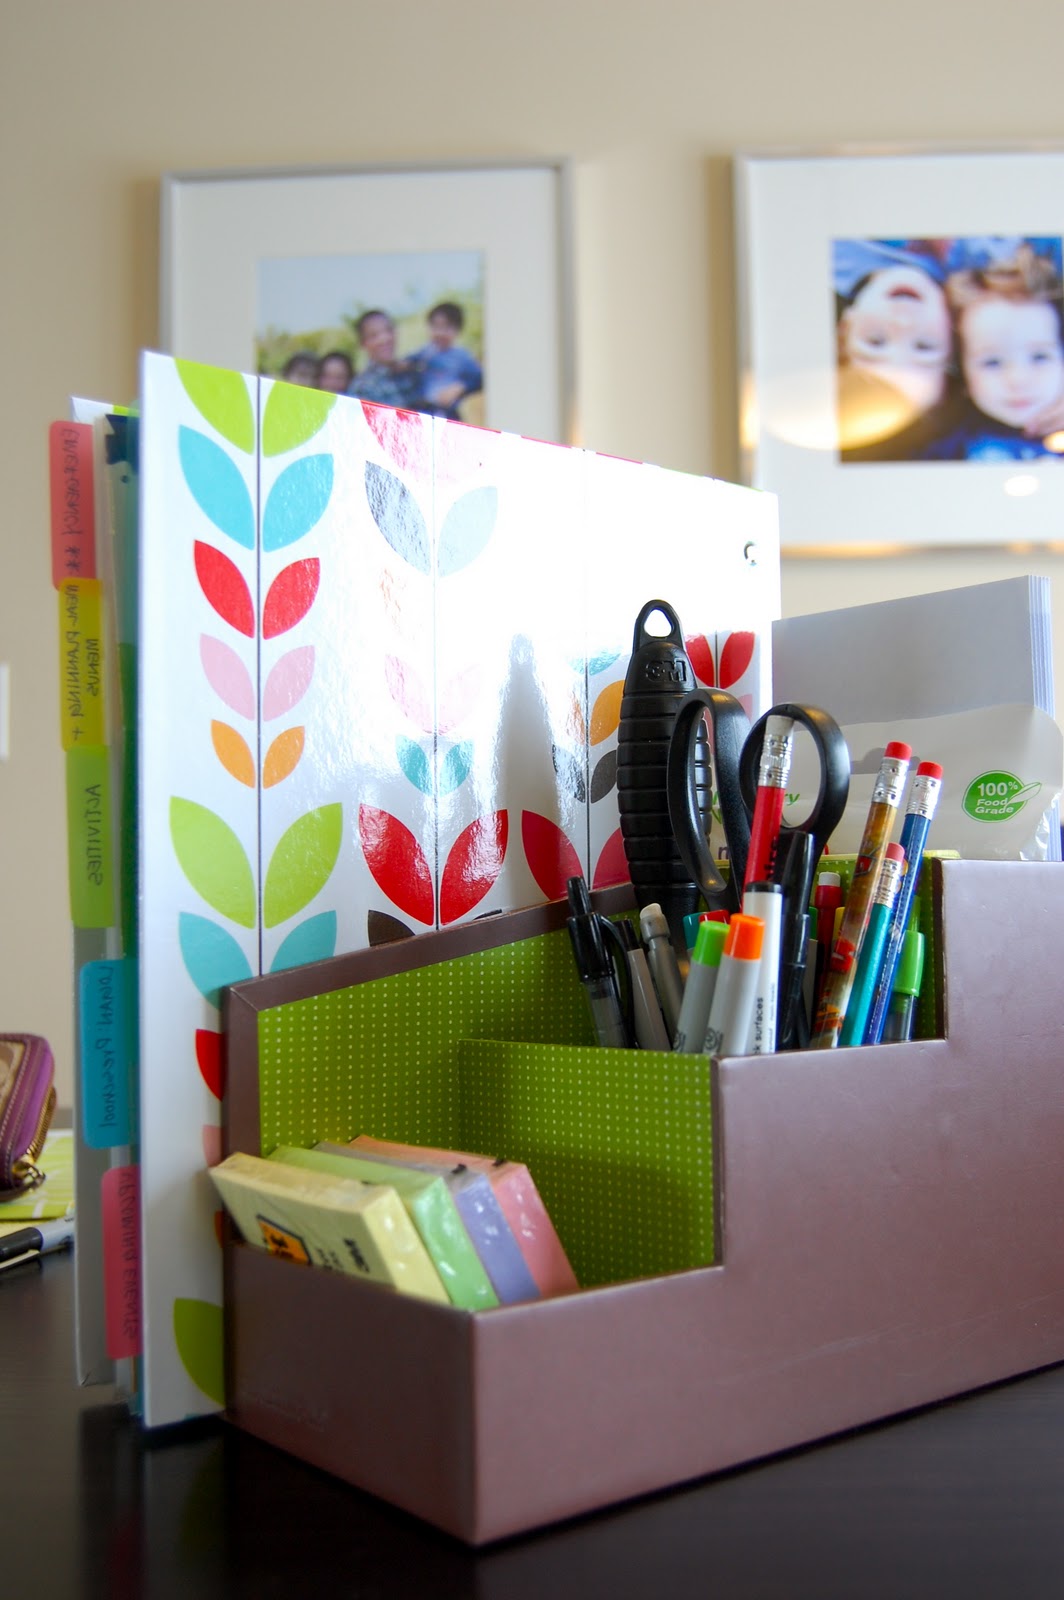
My binder is pretty simple with the following sections: family calendar, meal planning and menus, activities, preschool, church, and upcoming events.  The mini-guide even features a link to where you can purchase the supplies you may need.

I didn't have a basket or bin to hold my binder and supplies, so I used this desk organizer that was around the house.  We have post-its, pens, pencils, markers, scissors, envelopes, baby wipes, paper clips, rubber bands and a lint roller in this caddy.

Here it is, in its new home - hidden on the side of the fridge with a meal planning worksheet and corkboard.  Now, I'll just have to find a new place for my stand mixer.  :)